AWS hosted key
To allow root keys to be hosted externally, a number of key providers are supported. One such provider is AWS KMS. Currently, Antimatter supports two methods for hosting the domain Root Encryption Key (REK) in Amazon Web Services Key Management Service (AWS KMS):
- Hold the key in AWS KMS and delegate access to the key to the Antimatter account.
- Hold the key in AWS KMS and create a service account for Antimatter to use to access the key.
Both options are covered below. For this guide, we assume that the Antimatter CLI has been installed (see CLI) and that a domain has been created.
Access the key management page.
- Dashboard
- CLI
If using the dashboard, navigate to Domain Configuration -> Encryption Rotation and select the option: "Change Root Encryption Key Configuration"
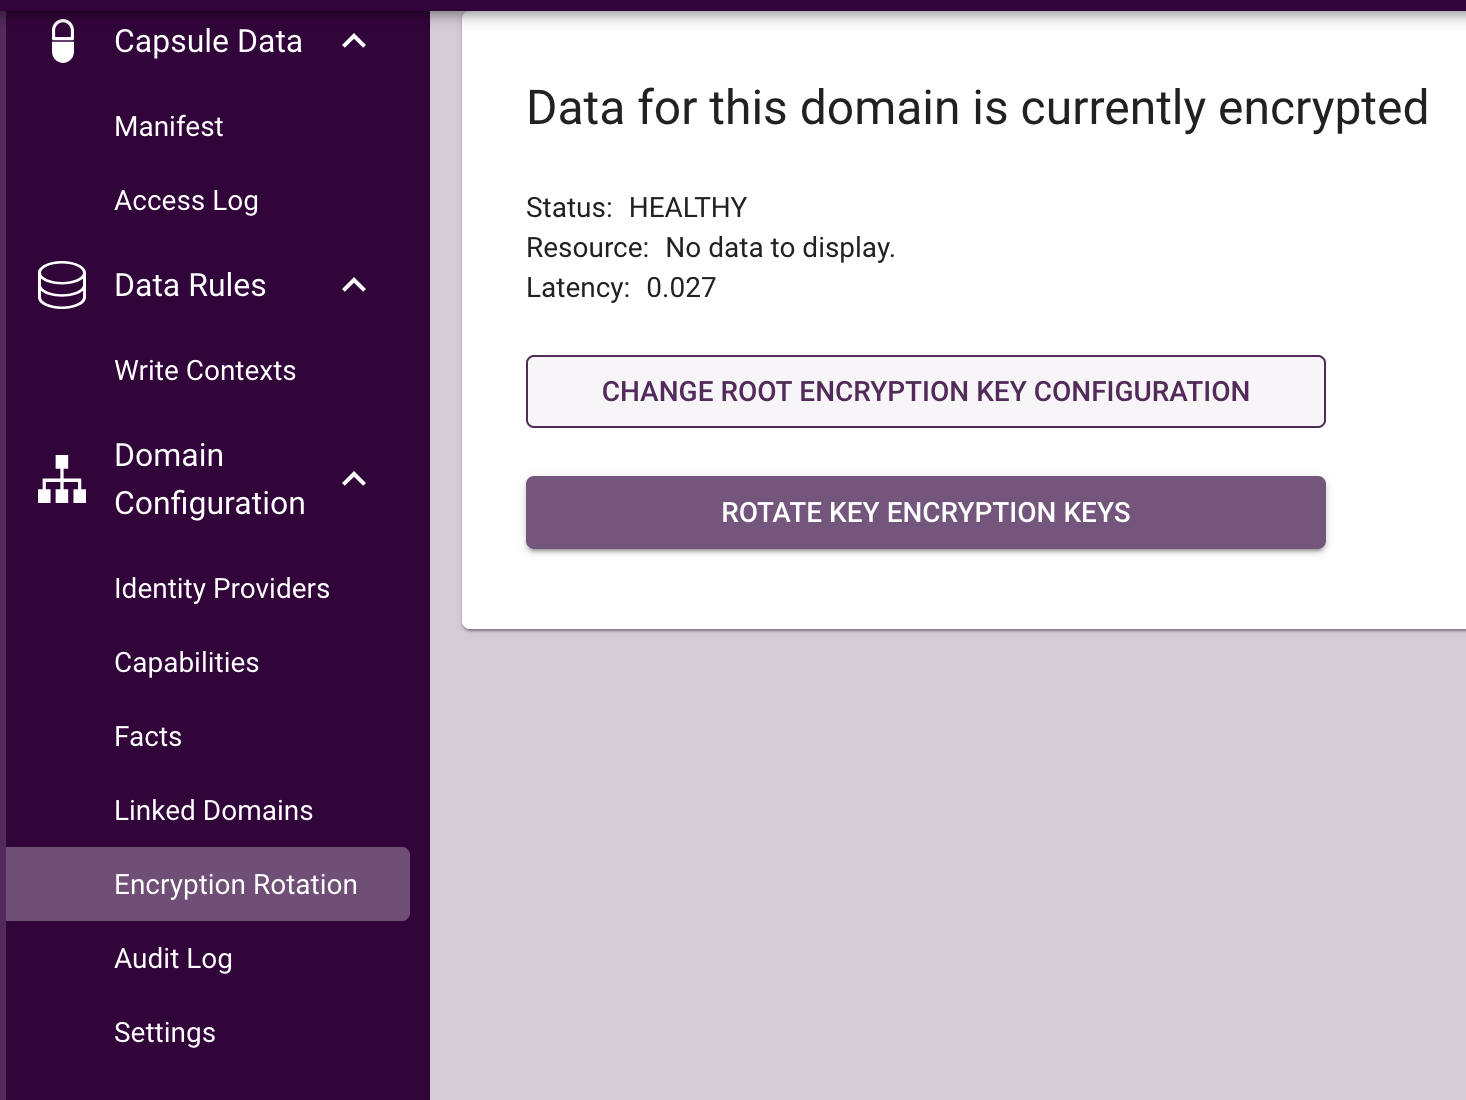
This will redirect you to the key management modal where the REK source can be selected.
If using the CLI, a link to the key management page can be generated using the self-serve subcommand. First, ensure
the CLI is authenticated and using the relevant domain. You will need to provide an API key or specify a suitable Oauth
provider.
am config domain login --api-key <api-key>
Or
am config domain login --oauth-provider <provider>
Once the CLI is authenticated, the key management URL can be generated using:
am keys self-serve --vendor <company-name>
This will generate a URI for the key management landing page.
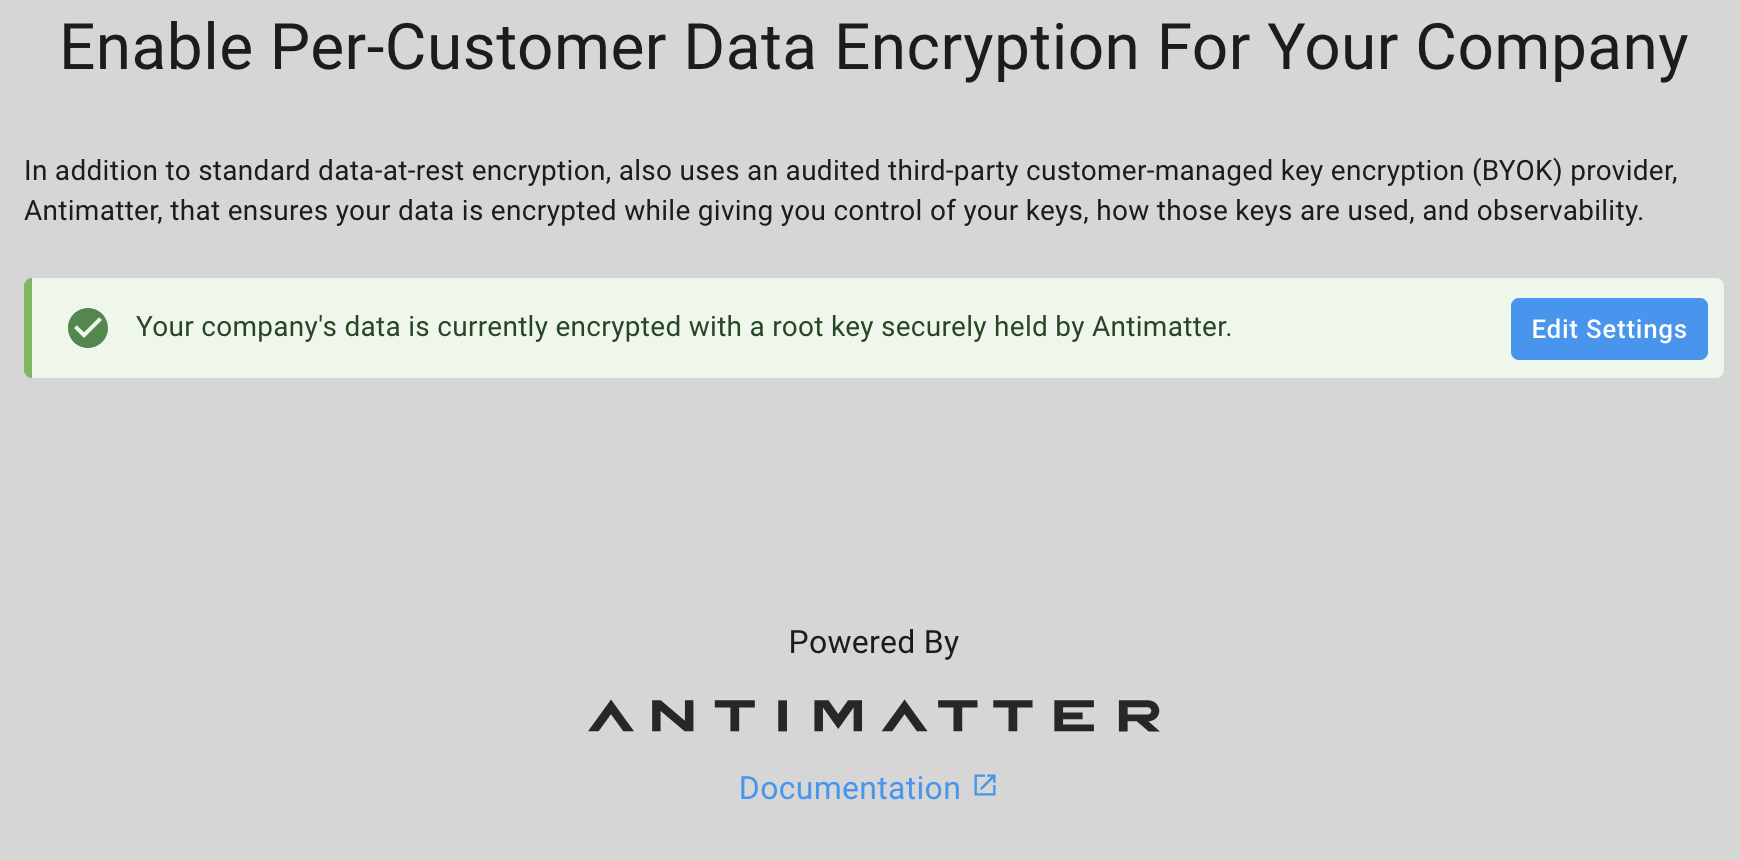
From here, select "Edit Settings" and you will be presented with the different key hosting options.
Adding an AWS Root Key
- Delegated Key
- Service Account
To delegate a key hosted in an AWS KMS for use by Antimatter, the following operations need to occur:
- A key must be created if it does not already exist.
- A key alias must be created that includes the domain ID in the form
alias/<domain-id> - Permission must be given to allow the Antimatter AWS account to access the key for the following actions:
{
  kms:DescribeKey,
  kms:GenerateDataKeyWithoutPlaintext,
  kms:Decrypt,
  kms:ReEncryptFrom,
  kms:ReEncryptTo
}
The simplest way to perform the above steps is through the key management UI, however, it is also possible to add a key through the CLI.
From the key management UI, adding a delegated AWS key is done by first selecting the option; "I want to configure my own externally-held key." and then selecting 'Next'. The user can then select a provider to host the key, for this example, select "AWS key management" and click 'Next'.
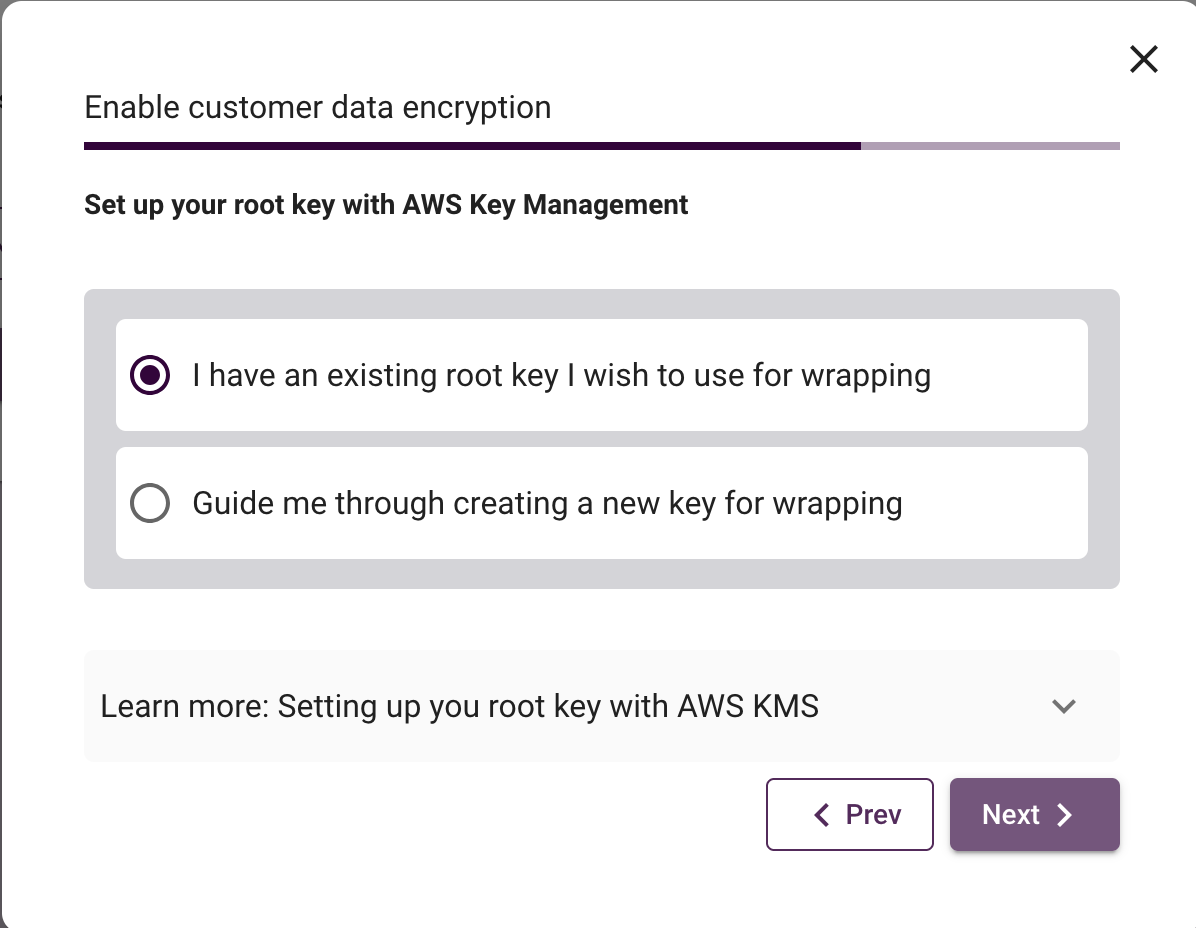
You will now be given the option to use either an existing key, or be guided through the process of creating a new one. In both cases, the next step will require access to a terminal with the AWS CLI installed and authenticated. This can either be done locally, or via a CloudShell in the AWS web console.
- Existing Key
- New Key
If you wish to use an existing key, then select "I have an existing REK I wish to use for wrapping" and click 'Next'. On the subsequent pane, you will be provided with a script that must be run in a terminal with the AWS CLI available.
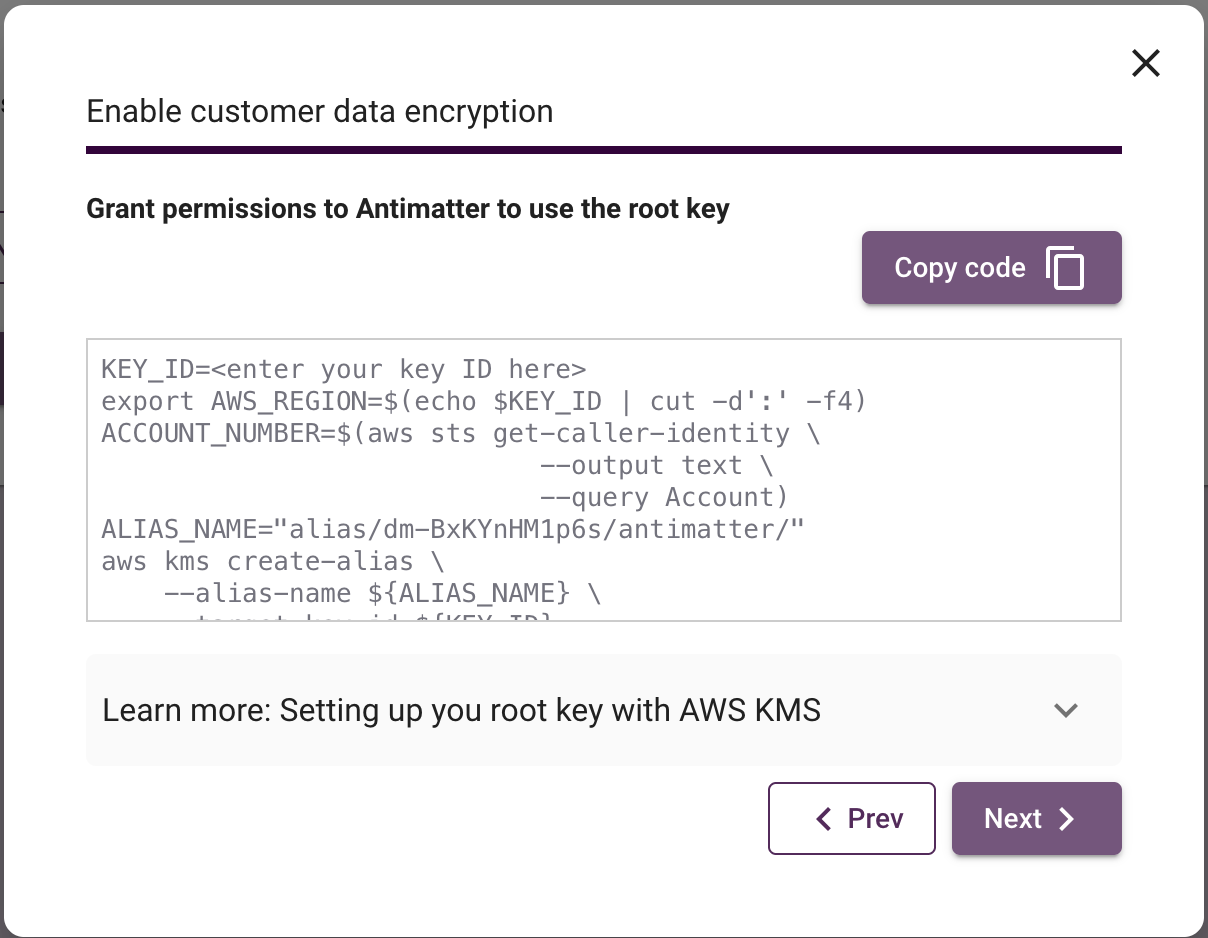
While this script is intended to be used as-is, it does require one modification. You will be required to include
the key ID to be shared with Antimatter on the first line, in the form. This must be added in place of
<enter your key ID here>.
The script will perform the following actions:
- Fetch the account number of the current user executing the script.
- Create an alias of the key of the form
/alias/<domain-id>/antimatter. - Printout the key alias resource name.
The key alias name here is important as it must have the form /alias/<domain-id>/antimatter. This is required so that
Antimatter can confirm that the alias supplied is intended for the domain. Removing the alias or supplying one that
does not contain the above form will result in Antimatter being unable to use it as a Root Key. Additionally, note the
permissions added to the alias. These are the minimal permissions required to allow Antimatter to describe the key and
use it to wrap internally generated keys used for encryption.
Once run, the script will return: Key alias (save this for next step): arn:aws:kms:REGION:aaaaaaaaaa:key/alias/<domain-id>/antimatter.
Note this down for the final step.
If you wish to use a new key, then select "Guide me through creating a new key for wrapping" and click 'Next'. On the subsequent pane, you will be provided with a script that must be run in a terminal with the AWS CLI available.
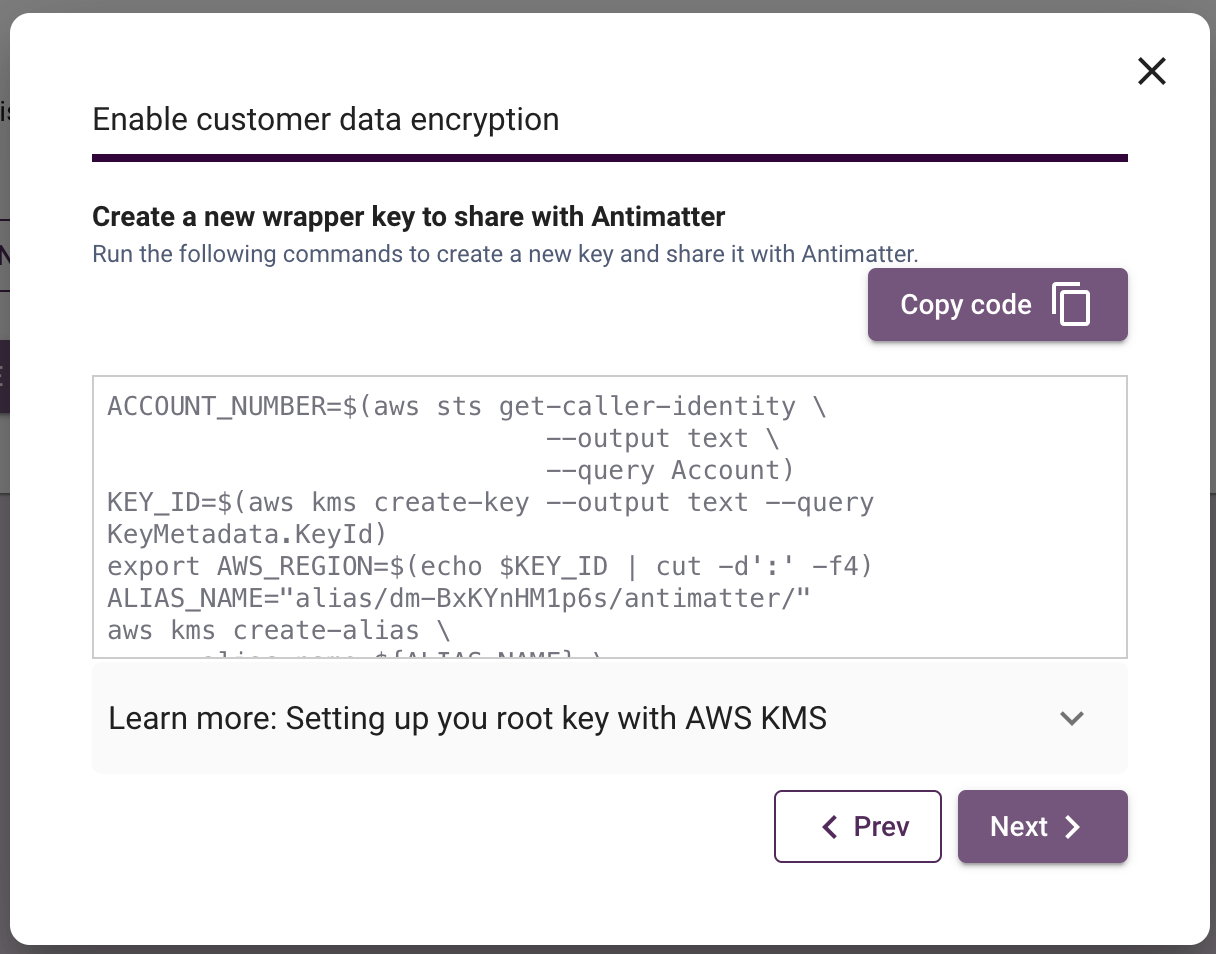
The script will perform the following actions:
- Create a new key to be used as the REK.
- Fetch the account number of the current user executing the script.
- Create an alias of the key of the form
/alias/<domain-id>/antimatter. - Printout the key alias resource name.
Note, the key alias name is important as it must have the form /alias/<domain-id>/antimatter. This is required so that
Antimatter can confirm that the alias supplied is intended for the domain id. Removing the alias or supplying one that
does not contain the above form will result in Antimatter being unable to use it as a Root Key. Additionally, note the
permissions added to the alias. These are the minimal permissions required to allow Antimatter to describe the key and
use it to wrap internally generated keys used for encryption.
Once run, the script will return: Key alias (save this for next step): arn:aws:kms:REGION:aaaaaaaaaa:key/alias/<domain-id>/antimatter.
Note this down for the final step.
After running the generated script, return to the key management page and click 'Next'. On the new pane you will be asked to submit the key ARN that was printed out after running the script. After pasting, click 'Apply' and wait for the paring check to complete. Once complete, click 'Done'.
Although the delegated AWS KMS key is the pattern that most BYOK/HYOK implementers have settled on, we also support access to a KMS key via a provided service account.
First, we create the key and the alias. To follow along, you will need to use AWS CloudShell or have an authenticated AWS CLI tool locally:
# Set up some useful variables
export DOMAIN_ID=dm-LCAJVnUE94B
export KEY_ALIAS="alias/${DOMAIN_ID}/antimatter/MyCompanyName"
export AWS_REGION=us-east-1
ACCOUNT_NUMBER=$(aws sts get-caller-identity \
                            --output text \
                            --query Account)

# Create the key and give it an alias (we will delegate the Alias to make key rotation easier)
KEY_ID=$(aws kms create-key --output text --query KeyMetadata.KeyId)
aws kms create-alias \
    --alias-name "${KEY_ALIAS}" \
    --target-key-id ${KEY_ID}

# Now grab the Alias ARN so we can use it later.
ALIAS_ARN=$(aws kms list-aliases \
                --key-id ${KEY_ID} \
                --output text \
                --query "Aliases[?AliasName=='$KEY_ALIAS'].AliasArn")
Next we create an IAM user and give it limited access to the key alias
aws iam create-user --user-name AntimatterREKAccess

aws iam put-user-policy --user-name AntimatterREKAccess --policy-name AntimatterREKAccess \
  --policy-document "$(echo '{
  "Version": "2012-10-17",
  "Statement": [
    {
      "Effect": "Allow",
      "Action": [
        "kms:DescribeKey",
        "kms:GenerateDataKeyWithoutPlaintext",
        "kms:Decrypt",
        "kms:ReEncryptFrom",
        "kms:ReEncryptTo",
        "kms:Encrypt"
      ],
      "Resource": "*",
      "Condition": {
        "ForAnyValue:StringEquals": {
          "kms:ResourceAliases": "KEY_ALIAS"
        }
      }
    }
  ]
}' | sed "s|KEY_ALIAS|${KEY_ALIAS}|")"
Finally, we get the credentials for this IAM user.
aws iam create-access-key --user-name AntimatterREKAccess
This should print something like this:
{
    "AccessKey": {
        "UserName": "AntimatterREKAccess",
        "AccessKeyId": "XXXXXXXXXXXXXXXXXXXXXX",
        "Status": "Active",
        "SecretAccessKey": "xxxxxxxxxxxxxxxxxxxxxxxxxxxxxxxxxxxx",
        "CreateDate": "2024-04-11T00:21:38+00:00"
    }
}
Save the SecretAccessKey and AccessKeyId for the next step, where we add the key to Antimatter:
KEY_ALIAS_ARN=arn:aws:kms:af-south-1:612795299999:alias/dm-xxxxxxxxxxx
AWS_ACCESS_KEY_ID=AKIA3ZMK73YH4FBPMAID
AWS_SECRET_ACCESS_KEY=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
am keys create --provider aws_sa \
               --access-key-id ${AWS_ACCESS_KEY_ID} \
               --secret-access ${AWS_SECRET_ACCESS_KEY} \
               --key-arn ${KEY_ALIAS_ARN} \
               --description 'my new key'